
Follow these steps to set up your new computer and connect to your office workstation.
Before You Begin — Hardware Setup
- Connect power — Plug the power cable into the back of the PC and into a wall outlet or power strip.
- Connect your monitor — Plug the monitor video cable (HDMI or DisplayPort) into the PC, then connect the monitor power cable and turn it on.
- Connect keyboard and mouse — Insert the small USB wireless dongle from the keyboard/mouse kit into any USB port on the PC. Install batteries if needed.
- Power on the PC — Press the power button. The Windows lock screen will appear after a short startup.
Step 1 — Connect to the Internet
An internet connection is required to complete your first sign-in. Choose either option below.
Option A — Wi-Fi
- From the lock screen, click the Wi-Fi icon in the bottom-right corner of the screen (highlighted in the screenshot below).
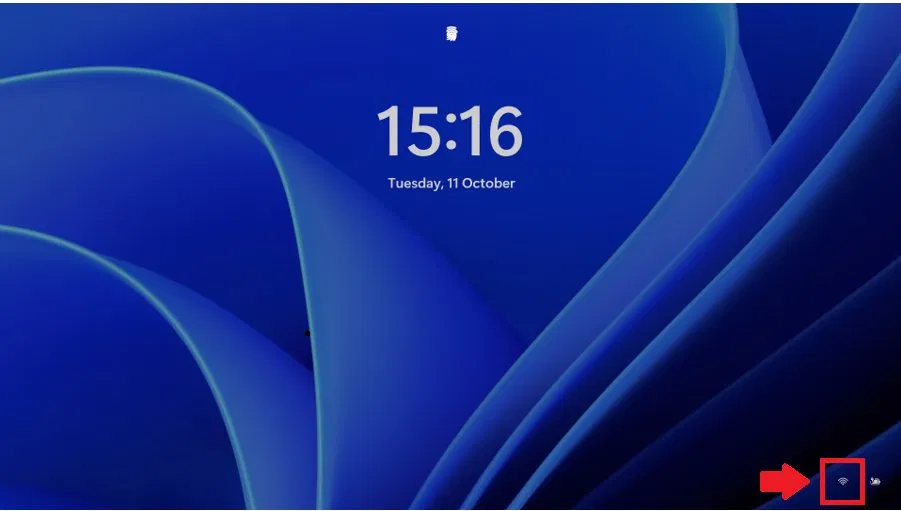 Windows 11 lock screen — click the Wi-Fi icon in the bottom-right corner
- Select your Wi-Fi network, click Connect, and enter the password when prompted.
Option B — Network Cable (Ethernet)
Plug a network cable into the Ethernet port on the back of the PC (it looks like a wide phone jack). Windows will connect automatically — no password required.
Step 2 — Sign In with Your CTS Account
This computer uses Microsoft Azure Active Directory. Sign in with your CTS email and password.
- Click anywhere on the lock screen (or press any key) to reach the sign-in screen.
- Enter your CTS email address:
firstinitiallastname@ctscement.com - Enter your password and press Enter.
- If prompted for multi-factor authentication (MFA), approve the request in your authenticator app or enter the code sent to your phone.
- Windows will finish setting up your profile. This may take 2–5 minutes on first login. Wait until the desktop fully loads before continuing.
Step 3 — Connect to CTS VPN
Once your desktop loads, connect to the VPN before accessing your office PC. The server is already pre-configured.
- Find the Cisco Secure Client icon on your desktop and double-click it.
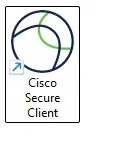
Cisco Secure Client desktop icon
- The Cisco Secure Client window will open with CTS Corporate VPN already selected. Click Connect.
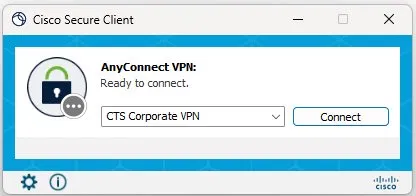
The server address is pre-configured — just click Connect
- Enter your CTS username and password when prompted, then click OK.
firstinitiallastname@ctscement.com - When connected, a lock icon will appear on the Cisco Secure Client icon in the system tray (bottom-right of your taskbar).
Step 4 — Connect to Your Office PC via Remote Desktop
With VPN connected, use Remote Desktop to access your office workstation as if you were sitting in front of it.
- Find the Remote Desktop Connection icon on your desktop and double-click it.
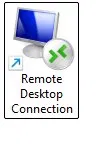
Remote Desktop Connection icon
- When the login prompt appears, enter your CTS domain credentials:
Username ctscement\firstinitiallastname or firstinitiallastname@ctscement.com Password Your CTS network password - Click OK. Your office desktop will load in a full-screen window.
? Daily Use — Quick Reference
| # | Situation | What to do |
|---|---|---|
| 1 | Every morning | Power on → Sign in → Connect VPN → Open Remote Desktop |
| 2 | Remote Desktop won’t connect | Make sure Cisco VPN is connected first, then try again |
| 3 | VPN disconnects | Double-click Cisco Secure Client → Click Connect again |
| 4 | End of day | Log off the Remote Desktop session → Disconnect VPN |
| 5 | Locked out / forgot password | Contact IT Support — do not attempt multiple failed logins |
Need help? Contact IT Support at support@ctscement.com